


Table of contents
NestJS (Nest) is a Node.js framework for building server-side applications. It has full Typescript support and uses Express under the hoods, but can be configured to use Fastify as well. Nest provides an out-of-the-box application architecture that allows developers and teams to create highly testable, scalable, loosely coupled, and easily maintainable applications. The architecture is heavily inspired by Angular.
Talking about Angular, Nest has also a CLI that is very much useful and if used properly can help to follow standard conventions in the project. In this article, we will look at how to build a simple GET REST API using Nest.
First of all, we need to install CLI assuming we have Node.js & NPM already installed.
npm i -g @nestjs/cli
Then create a new project
nest new rest-api
Once you enter the above command, you will be asked to choose the package manager for this project. We will use NPM, but you can choose Yarn or other available options.
Once you are done with the above steps, open the folder with your project name (rest-api in this case) in any IDE or editor of your choice. We will use VSCode here, but feel free to choose, what you are comfortable with. You will see a similar structure as below, based on your version of Nest.

Expand the source folder and you will see 1 main.ts file and other app module files with the names app.controller.ts, app.module.ts, app.service.ts, and app.controller.spec.ts. Let's discuss the concepts related to the files that are created.
| A basic controller with a single route. |
| The unit tests for the controller. |
| The root module of the application. |
| A basic service with a single method. |
| The entry file of the application which uses the core function |
Module
It is a way to organize applications and put related functionality together. Each application must have at least 1 root module. Read more
Controller
Controller is meant for handling the request and sending the response back to the client. Read more
Service
It holds the business logic for the application, like data storage, retrieval, and use by controllers. Read more
For the purpose of this article let's create a simple GET /developers endpoint.
First, let's create a developers module and add a controller and service file. But, wait why not try Nest CLI? 😊
nest generate resource developers # select no for CRUD entry points
The above command will add a folder with files like below
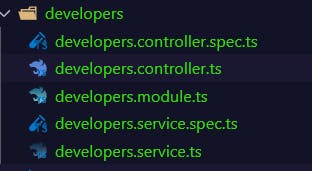
Open the controller file and modify it to look like the following code snippet.
import { Controller, Get } from '@nestjs/common';
import { DevelopersService } from './developers.service';

@Controller('developers')
export class DevelopersController {

  // private readonly developersService: DevelopersService is Injecting
  // the service here via DI pattern.
  constructor(private readonly developersService: DevelopersService) {}

  @Get() // Here Get is basically HTTP GET
  findAll() {
    return this.developersService.findAll();
  }
}
Open the service file and modify it to look like following
import { Injectable } from '@nestjs/common';

@Injectable()
export class DevelopersService {
  findAll() {
    return [
      { name: 'Abdur Rehman', role: 'Full Stack Developer' },
      { name: 'Danish Alam', role: 'Full Stack Developer' },
    ];
  }
}
Now it's time to start the app. Use command below
npm run start:dev # run in root of project
Open http://localhost:3000/developers in any browser and you should see the response.✌
You can find the source code here.